Video Systems
Church, Schools, Military and Governmental Video Systems. Our services include bid specifications, design, engineering, installation and training.
Video System Requirements and Costs.
HOW TO DETERMINE SYSTEM REQUIREMENTS AND COSTS
TV Pro Gear designs, engineers and builds:
- Television stations
- Production studios
- Video production trucks
- Post production facilities
- Infrastructure for streaming video to the Internet in High Definition.
We do this for clients as large as Time-Warner, NBC and AT&T and as small as schools, churches and developing world startups. We have provided engineering services and installation in countries such as Bulgaria, Libya, Egypt and Guatemala. We have been doing this for fourteen years.
Every week, we get dozens of requests from companies and individuals asking questions such as:
- How much is a video truck? The answer is from $150,000 to $6,000,000 dollars.
- How much for a television station? The answer to this is from $50,000 to $25,000,000 dollars.
These kinds of questions are not unlike asking an architect, “how much is a house” or asking a car salesman, “how much is a car”. In order to give an accurate answer, we need to preform a “Needs Analysis”, “Scope of Work Document”, “Workflow Diagram” and “Detailed Equipment List with Pricing”.
Needs Analysis: This consist of asking a series of questions to determine exactly what it is you want to do. For example, if you are planning a television station, how many hours of original programming will you produce each week? What types of programming (news, talk shows, sports)? Will you be shooting on location? If so, will it be news, entertainment or sports? How much of your content will be provided from other sources (such as satellite, cable, Internet or on tape)? How are you going to distribute your programs (over-the-air, via satellite, on cable, via Internet). Without answers to these questions, we do not know what equipment and how much equipment will be required. The answers to these and dozens of other questions help us to come up with the “scope of work” document.
Scope of Work: This document states what you are going to do, how many hours of programing you will create each week, what types of programming and how you will distribute it. Once you approve this document we can move to the next step that is creating the “Workflow Document”.
Workflow Document: This is a large CAD drawing that shows the principle elements of production (such as cameras, servers, control rooms, editing rooms, uplink dishes and so forth). This document is a visual presentation of how your system will work. This is a critical because a poorly designed workflow can result in a system that is not able to handle the volume of content you will have. It can lead to missed deadlines, frustrated employees and poor quality. Conversely, a well-designed workflow will result in efficient production, smooth operations and happy customers and employees. It will also allow future expansion without waste.
Detailed Equipment List and Labor Costs: Having performed the above items, we now have enough information to do preliminary engineering. With that completed, we can generate a detailed list of equipment. This will typically consist of hundreds of items from dozens of manufacturers. It always includes many conversations with the manufacturers as models and prices are constantly changing. In short, this is a time consuming process. Complex calculations have to be made to estimate the time it will take to design the system, create the CAD drawing, acquire all of the equipment, install it, wire it and produce proper labels, diagrams and operations manuals. Finally, we include costs for training and supporting your staff.
As you may expect, the above work cannot be done by a clerk. It requires the expertise of highly qualified video engineers with years and years of experience. Employees with this kind of experience are in high demand with salaries and benefit packages typically in excess of $175,000 year. Less expensive, less experienced engineers end up costing you more because they specify too much equipment or too little equipment to get the job done. Even worse, they may specify the wrong equipment.
In order for TV Pro Gear to provide you with meaningful advice and equipment costs, we require that you enter into a consulting agreement. Should you choose to retain us, we look forward to designing a system for you that will achieve your goals at the most cost-effective price.
Studio Acoustic Design
Sound In the Real World
In nature, surfaces are very irregular with very few parallel surfaces for sound to reflect back and forth. So, the sound we hear outdoors is natural, without echoes and does not emphasize one frequency over another. Indoors, rooms reflect sound. The amount of sound reflected is determined by the shape and size of the room as well as the surfaces of the walls, floor and ceiling. Imagine you are in a large empty room with the floor and walls made of marble. These hard surfaces will reflect sound and create echoes. On the other hand, if you were in a very small room with thick carpet, an acoustic tile ceiling and lots of furniture to break up the sound waves, the room would be echo free. In fact, it would sound similar to sound outside.
It is very easy to add echo and reverberation. Unfortunately, it is almost impossible to remove it. A correctly designed room should not emphasize or inhibit any frequencies. Therefore, stages should be designed to be as non-reflective (dead) as possible. That way, during post-production, the correct amount of reverberation can be added so that the sound is natural.
Control and editing rooms need to be non-reflective so that the sound that is heard is the same as what is being recorded or played back.
There are two areas of acoustical concern when designing video production facilities: the acoustical properties of the rooms and sound leakage between rooms.
Preventing Sound Leakage Between Rooms
There are three methods to prevent sound leakage: absorption, mass and sound transmission avoidance. Sound transmits through the walls, floor and ceiling. Using staggered 2X4 studs within the walls nailed to 2X6 base plates is the standard way to insure that two adjoining walls do not have any common surfaces. The 2X6 base plates need to have a rubber gasket between the floor plate and the concrete floor. R19 insulation is inserted between the studs. Cutting groves in the concrete floor between the rooms also reduces transmission.
The walls need to have two layers of 5/8” drywall attached to both sides of the wall. This gives mass to the wall to help absorb high and low frequencies. The ceiling should be built in the same manner as the walls. HVAC ducts need to be installed with noise traps. Larger than normal ducts deliver adequate airflow at a lower velocity – thus reducing noise from the HVAC.
Acoustical Properties Within the Editing and Control Rooms
Poorly designed rooms result in poor sound that can be too dead or so reflective they become echo chambers. A well-designed control room will:
- Not emphasize any particular frequency. In other words it will have a flat response.
- Have a large “sweet spot” for stereo imaging. In other words, the stereo sound will not change much as the operators move from side to side.
- Not have any dead spots.
- Not reflect sound off the walls causing echoes.
These goals are achieved in two ways: correct room proportions and sound treatments on the walls. Below are the rules for correct room proportions:
- No two wall dimensions shall be divisible into each out. For example a 10’ by 10’ room would be horrible. If the ceiling was 10’ high, it would be even worse. The room would cause “standing wave reflections” resulting in “wave cancellations”. This would be experienced as dead zones with muddy, dull sound. A 10 X 20 room would be almost as bad. A 9X17 room would be good as there is no whole number that can divide into them. Likewise an 11’ by 15’ is acceptable. One must also factor in the height of the room. For example, a 12’ wide by 17’ length by 9’ high would be bad because the 12’ width and the 9’ height can be divided by 3
- No wall should be parallel in any plane. In other words, the walls should be tilted 2 or 3 degrees from each other top to bottom and left to right. The same goes for the floor and ceiling.
- The classic live end/dead end room is ideal. By this, we mean that one end of the room should have hard surfaces while the other end of the room should have soft sound absorbing surfaces (bass trap).
- Near the front of the room, the left and right wall’s should have “Helmholtz Resonators”. They are large pieces of pegboard with holes drilled into them to breakup sound waves.
- The ceiling should angle downward from the front of the room at approximately 15° for 1/3 of the distance of the total length of the room. It then should angle upwards at about 10° degrees for the last 2/3 of the length of the room. (see illustration on previous page)
Next we address wall treatments. Wall treatments are used to inhibit sound reflections and to trap low frequencies. Of course, one must be careful to not apply too many inhibitors, as the room can become dead and muddy sounding. Generally we construct the front of the room with hard surfaces to project the sound from the speakers towards the rear of the room. At the rear of the room we have materials that trap sound so that it is not reflected back into the room creating noise cancellation. This is called a “Base Trap”. Along the sidewalls we apply acoustic foam sporadically.
Summary
Proper stage and control room design is 70% science and 30% art. Incorporating the fundamentals of proper design as specified in this article adds to the cost of building the rooms. However, correcting bad acoustics as a result of building a poorly designed room is way more expensive. That is why anyone planning to build a new stage or control room should hire an experienced designer who understands acoustic fundamentals.
Studio Lighting Design
Whether you are planning to build a new studio from the ground up or doing an upgrade, proper lighting design is essential. Office, stage and post-production rooms each have different requirements.
Office lighting needs to take into account exterior/ambient light. Dimmable LED lights are most often specified to lower electricity and HVAC costs.
Post-production rooms require special dimmable LED lights that match the color temperature of the monitors. Placement is crucial so that they do not cause glare on the monitors.
Stage lighting is determined by what is to be shot. Generally, stage lights fall into four categories:
- HMI lights – these are very high output daylight balance lights mostly used for theatrical/dramatic productions. They are efficient but run hot and are costly.
- Tungsten lights are the least costly fixtures and provide a big variety of “looks” form soft to hard. However, they are power hungry, run hot and the expensive lamps need to be replaced often. Also, they require expensive dimmers and change color temperature when dimmed. More and more, they are being replaced by fluorescent and LED.
- Fluorescent studio lights use special lamps that come in both 3200k and 5600k. They use about 1/10th of the electricity of Tungsten lights thus reducing electricity and air conditioning costs. On the other hand, they cost three or four times as much as Tungsten to purchase. Generally, fluorescent lights provide a softer light that is ideal for news, talk shows or situation comedy’s. They are not very good for dramatic shows as they don’t cause sharp shadows.
- LED lights are rapidly becoming the light of choice. They use very little power, put out no heat and can be made to be soft or hard light. The fact that they can be dimmed without changing color temperature is a great bonus. Other LED lights can be purchase that have a knob the lets the lighting director choose the color temperature so he can get just the effect he wants. The purchase cost of these LED lights is very high. However, the extremely long lamp life combined with the saving on electricity and HVAC justifies the expense in the long run.
In addition to the lights, a lighting grid or truss will be required on which to hang the lights. Usually built on 4 foot centers, it is important to calculate the load bearing ability of the ceiling it is attached to. The amount of power that is required and the distribution of that power must be calculated and designed. This chore is handled by our Emmy winning lighting designer working in conjunction with our engineers.
Editing Room Design
A properly designed editing room will result in edited masters that look and sound better. The following areas must be considered when designing an edit bay:
- Equipment choices
- Ergonomics
- Acoustics
- Lighting
Equipment Choices: What equipment will be required is very dependent upon what is being edited. For example, a feature film being shot digitally for theatrical release requires different monitoring and storage than a documentary shot in HD for distribution on television. Similarly, a weekly reality show requires different gear than an edit bay designed for commercial post-production. Of course, a television station doing multiple news broadcasts daily will require a whole different set of equipment.
In short, what is being shot and how much finished content must be delivered daily or weekly will determine what equipment and how much equipment will be required.
Ergonomics: Edit sessions often run long. A properly designed editing console with ergonomic site lines will reduce fatigue resulting in cleaner, more creative content. The edit console needs to be big enough to accommodate the equipment the editor will require. Ideally, it should be height adjustable. Also, the monitors should be each to adjust the height and angle. A comfortable chair, such as the ones available form Human Scale, is also essential.
Acoustics: During a post production session, the editor will be making many judgments about the sound track. Sometimes, picking which take to use will be determined by which take has the best sound. If the room is acoustically incorrect, it may be emphasizing or suppressing certain frequencies. This, of course, can lead to bad choices. Ideally, a TV Pro Gear engineer will specify dimensions and materials that will result in an acoustically neutral room with a large “sweet spot”. Where a room already exists, we can apply acoustic treatments to mitigate bad room characteristics. The reader may want to read our “Primer for Studio Acoustics” to get a deeper understanding of room acoustics.
In addition, careful attention must be made when choosing what speakers to use. At TV Pro Gear, we most often recommend Genelec 8020B speakers mounted at ear height. These speakers are designed to be listened to from about five feet away – they are called “near field monitors”.
Lighting: The editor will also be making color adjustments to the video. The color temperature of most professional monitors is 5600 degrees Kelvin. Therefore, it is important to have room lighting that is also 5600K. We recommend special focusable 5600K LED lights that can be dimmed without change the color temperature. Of course, it is critical to make sure that the lights do not shine on the monitors or into the editor’s face. Choice of colors for the walls, console surfaces, carpets and furniture should be varying shades of grey. To insure the monitors are accurately displaying the video, they must be carefully calibrated by an engineer The monitors are adjusted for brightness, contrast, color balance and saturation.
Summary: Following the above rules will greatly increase the odds that you will have a perfectly edited video ready for distribution. In addition, you will have happier editors resulting in lower employee turnover.
Studio Workflow Design
A properly designed television station or production facility will result in projects flowing through pre-production, production and post-production efficiently with no bottlenecks This will further result in higher output, less cost, less frustration and happier employees.
In order to have proper workflow, TV Pro Gear engineers first do a “Needs Analysis”. We work with our clients to determine what types content is to be created and how much video content will be produced over a given timeframe. Once completed, we use this information to determine what equipment will be required and how much space will be required. As part of this process we create a “Workflow Diagram”.
Whether the studio is a “ground up build” or “remodel” we create a “space plan”. Special attention is paid to making sure the rooms are placed in a logical order so the projects will flow through the building without unnecessary footsteps or interruptions on adjacent activities. For example, you don’t want an audio mixing room sharing a wall with a stage. Another example is that you do want the chief engineers office and the repair shop close to the main machine room. A hundred small decisions like these lead to higher quality, faster production and lower employee frustration.
If you are planning to build a new facility or upgrade an existing one, call TV Pro Gear.
Video Archiving Design
The Problem: Despite air conditioning and humidity controls, as soon as a tape hits the shelf its starts to deteriorate. The useful life of tape is hard to predict. For some tapes it may already be too late. Others may need restoration in order to retrieve the content.
The Solution: Convert the tapes to a high-density LTO Data Cartridge and store a perfect copy on the Cloud. Once converted, your tapes can be transcoded to any format in existence and even to formats not yet envisioned. Your tapes are double protected against damage or obsolescence.
Make It Better: Old tapes are often grainy, incorrectly exposed and have bits of emulsion flaking off resulting in dropouts. Older tapes may also suffer from low resolution. During the archiving process we apply digital grain reduction, exposure correction, color correction, drop-out compensation and image sharpening filters. The result is a digital image far superior to the original. This is accomplished using equipment from Front Porch Digital – the same equipment being used by the Smithsonian and the Library of Congress. There simply is no better way to protect and improve your tapes.
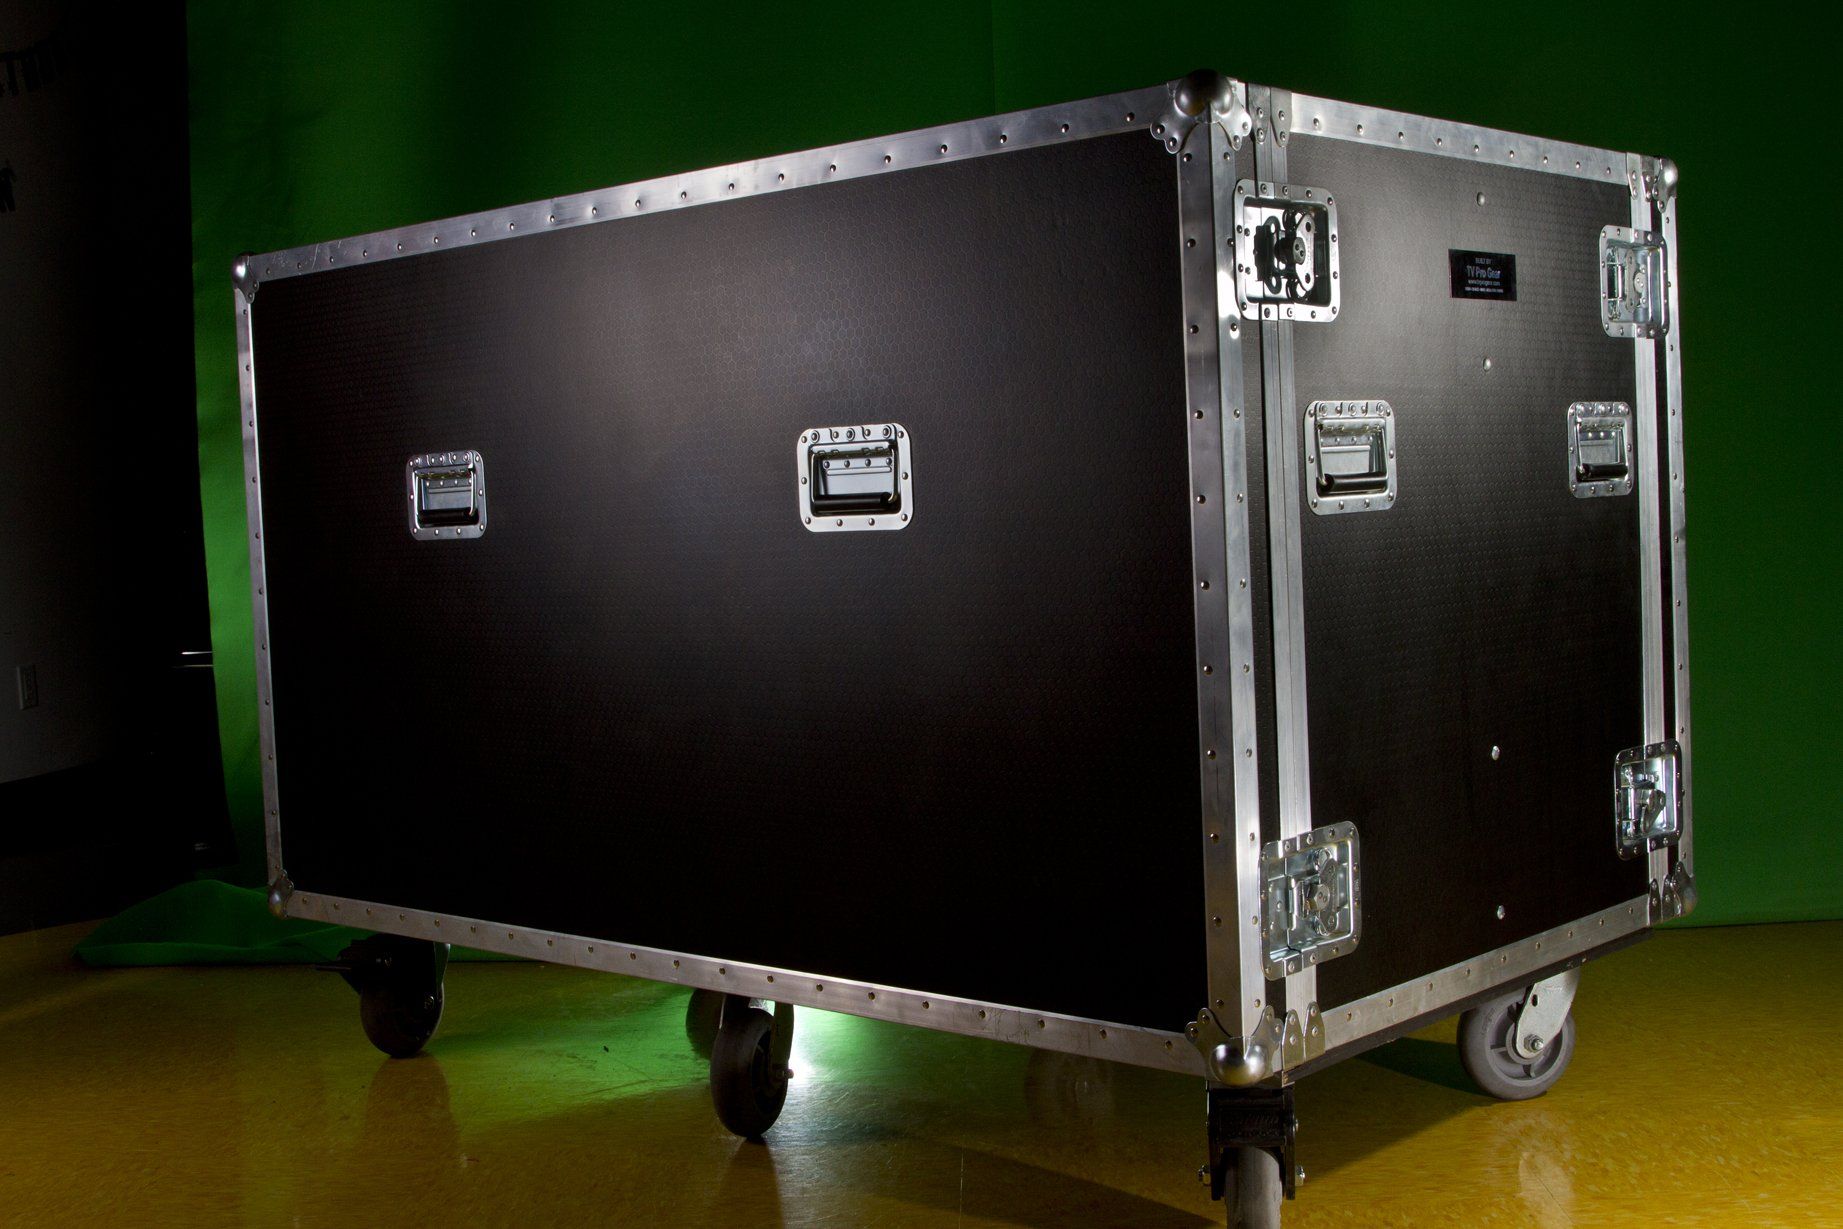
Your Tapes Never Leave Your Facility: Many clients do not want to have their priceless master tapes removed from their facility. TV Pro Gear’s Archive-Flypak™ system is operated by our staff at your location. Your priceless tapes never have to leave your premises. Up to five hundred tapes can be converted each day.
Make Your Tapes More Searchable and Sellable: Part of our conversion process includes creating a low-resolution proxy image of your video files. These proxy images are cross-referenced with a database describing the content of the tape. They are then searchable using any Internet browser such as Safari, Internet Explorer or Firefox.
Who Do You Trust: TV Pro Gear has been building video systems for fourteen years for companies such as NBC, AT&T, Comcast and Time Warner. Front Porch Digital is a manufacturer of video archiving software and hardware being used by ABC, the United Nations and The Arts and Entertainment Network.
If you have valuable tapes please call us so we can schedule an appointment to discuss the best way of protecting your assets and creating new ways to monetize their value.
Step 1: Tape Transfer
- Heat-treat the tape to unstick emulsion so it can be played without damaging it.
- Clean the tape using a special machine manufactured by Front Porch Digital.
- Copy the tape from a highly calibrated video player to a high performance computer hard drive.
Step 2: Evaluate the tape using special software from Front Porch Digital.
- Does it have dropouts (little black speckles)
- Is it noisy (looks like a grainy image)
- Is the resolution low (soft blurry image)
- Is the exposure right (image is too dark or too light)
- Are the colors faded or off (washed out or sepia toned)
- If originally transferred from film, are there scratches
Step 3: Tape correction. Using special software and computers, a highly trained artist/technician applies the following:
- DOC – Drop Out Compensation
- DNR – Digital Noise Reduction
- DSF – Digital Sharpening Filter
- DEC – Digital Exposure/Contrast Compensation
- DCC – Digital Color Compensation (hue and saturation)
- DSC – Digital Scratch Correction
Step 4: Archive the restored video file. There are several choices here
- Copy the file to a tape that is the same format as the original
- Copy the file to a more modern tape format (i.e from Beta to Digital Beta)
- Copy the file to an LTO-5 tape for long-term storage
- Copy the file to your video server
- Copy the file to a Cloud Server for off-site safety (co-location)
Coming Soon - Currently Under Development - On-Line Access Options During the process, it is possible to make a low-resolution proxy image of the footage that will be usable in a searchable database using a browser like Firefox or Safari. This video database can be encrypted so that only authorize people can view it. It can be protected so that viewers cannot copy it without additional authorization.
In order to facilitate the search-ability of the database, all pertinent information is entered into a proprietary computer program including but not limited to:
- Original Recording Date
- Producer/Director/Cameraman
- Owner of the tape
- Who is in the tape
- Location of the recording
- Content description
- Length
- Original format of the tape
During the process of copying the tape into the computer for processing, speech to text software makes an automatic log of what was said on the tape. In addition, facial recognition software automatically logs in who said what. The information is added to the file as “metadata”. This greatly increases the accuracy of later searches. For example, a viewer could query the database to show “all footage of Ronald Regan with Margret Thatcher in December of 1978”. Then a display on the computer of Picture Icons could be clicked on to play the clips.
The numbers you need to know
22
Branches around the world
120m
Customers in
24 countries
8x
Growth over the past year
100+
Features & capabilities
Over 5 decades of creating, designing, delivering, & broadcasting.
Warranty & Support
Every component in the Flypack and the system as a whole is warranted for 1-year. Extended warranties are available. Our support team is available 24/7.
TV Pro Gear systems are built by a group of perfectionists. We are not happy unless we exceed our customer’s expectations. To get a quote on a system customized to meet your needs, call TV Pro Gear today!
Equipment financing made simple.
TV Pro Gear has partnered with Southern California Leasing to offer our customers in the US and Canada equipment financing that's simple, cost effective and responsive.

“Great product. We love working with it!”
MashIt-
“Amazing service. Can’t wait to find out what’s next!”
FabuFit -
“Not sure what I did before discovering this Product. It’s super!”
YesSuits
Gallery
California
1630 Flower Street
Glendale, CA 91201
Ph (818) 246-7100
Fx (818) 246-1945
Quick Links
News
©TV Pro Gear 2022. All Rights Reserved. Privacy Policy